

The Great Divide Mountain Bike Route holds the unique distinction of being the world's longest unpaved route system. Crisscrossing the Continental Divide from alberta through the Canadian and American Rockies to its southern terminus at the mexican border, brian kesselman completed the 2784 mile route solo and self-supported with 161,563 feet of climbing, averaging 92.8 miles a day over 30 days. We caught up with brian to gain some technical and experiential insights about the process, the prep and the journey.
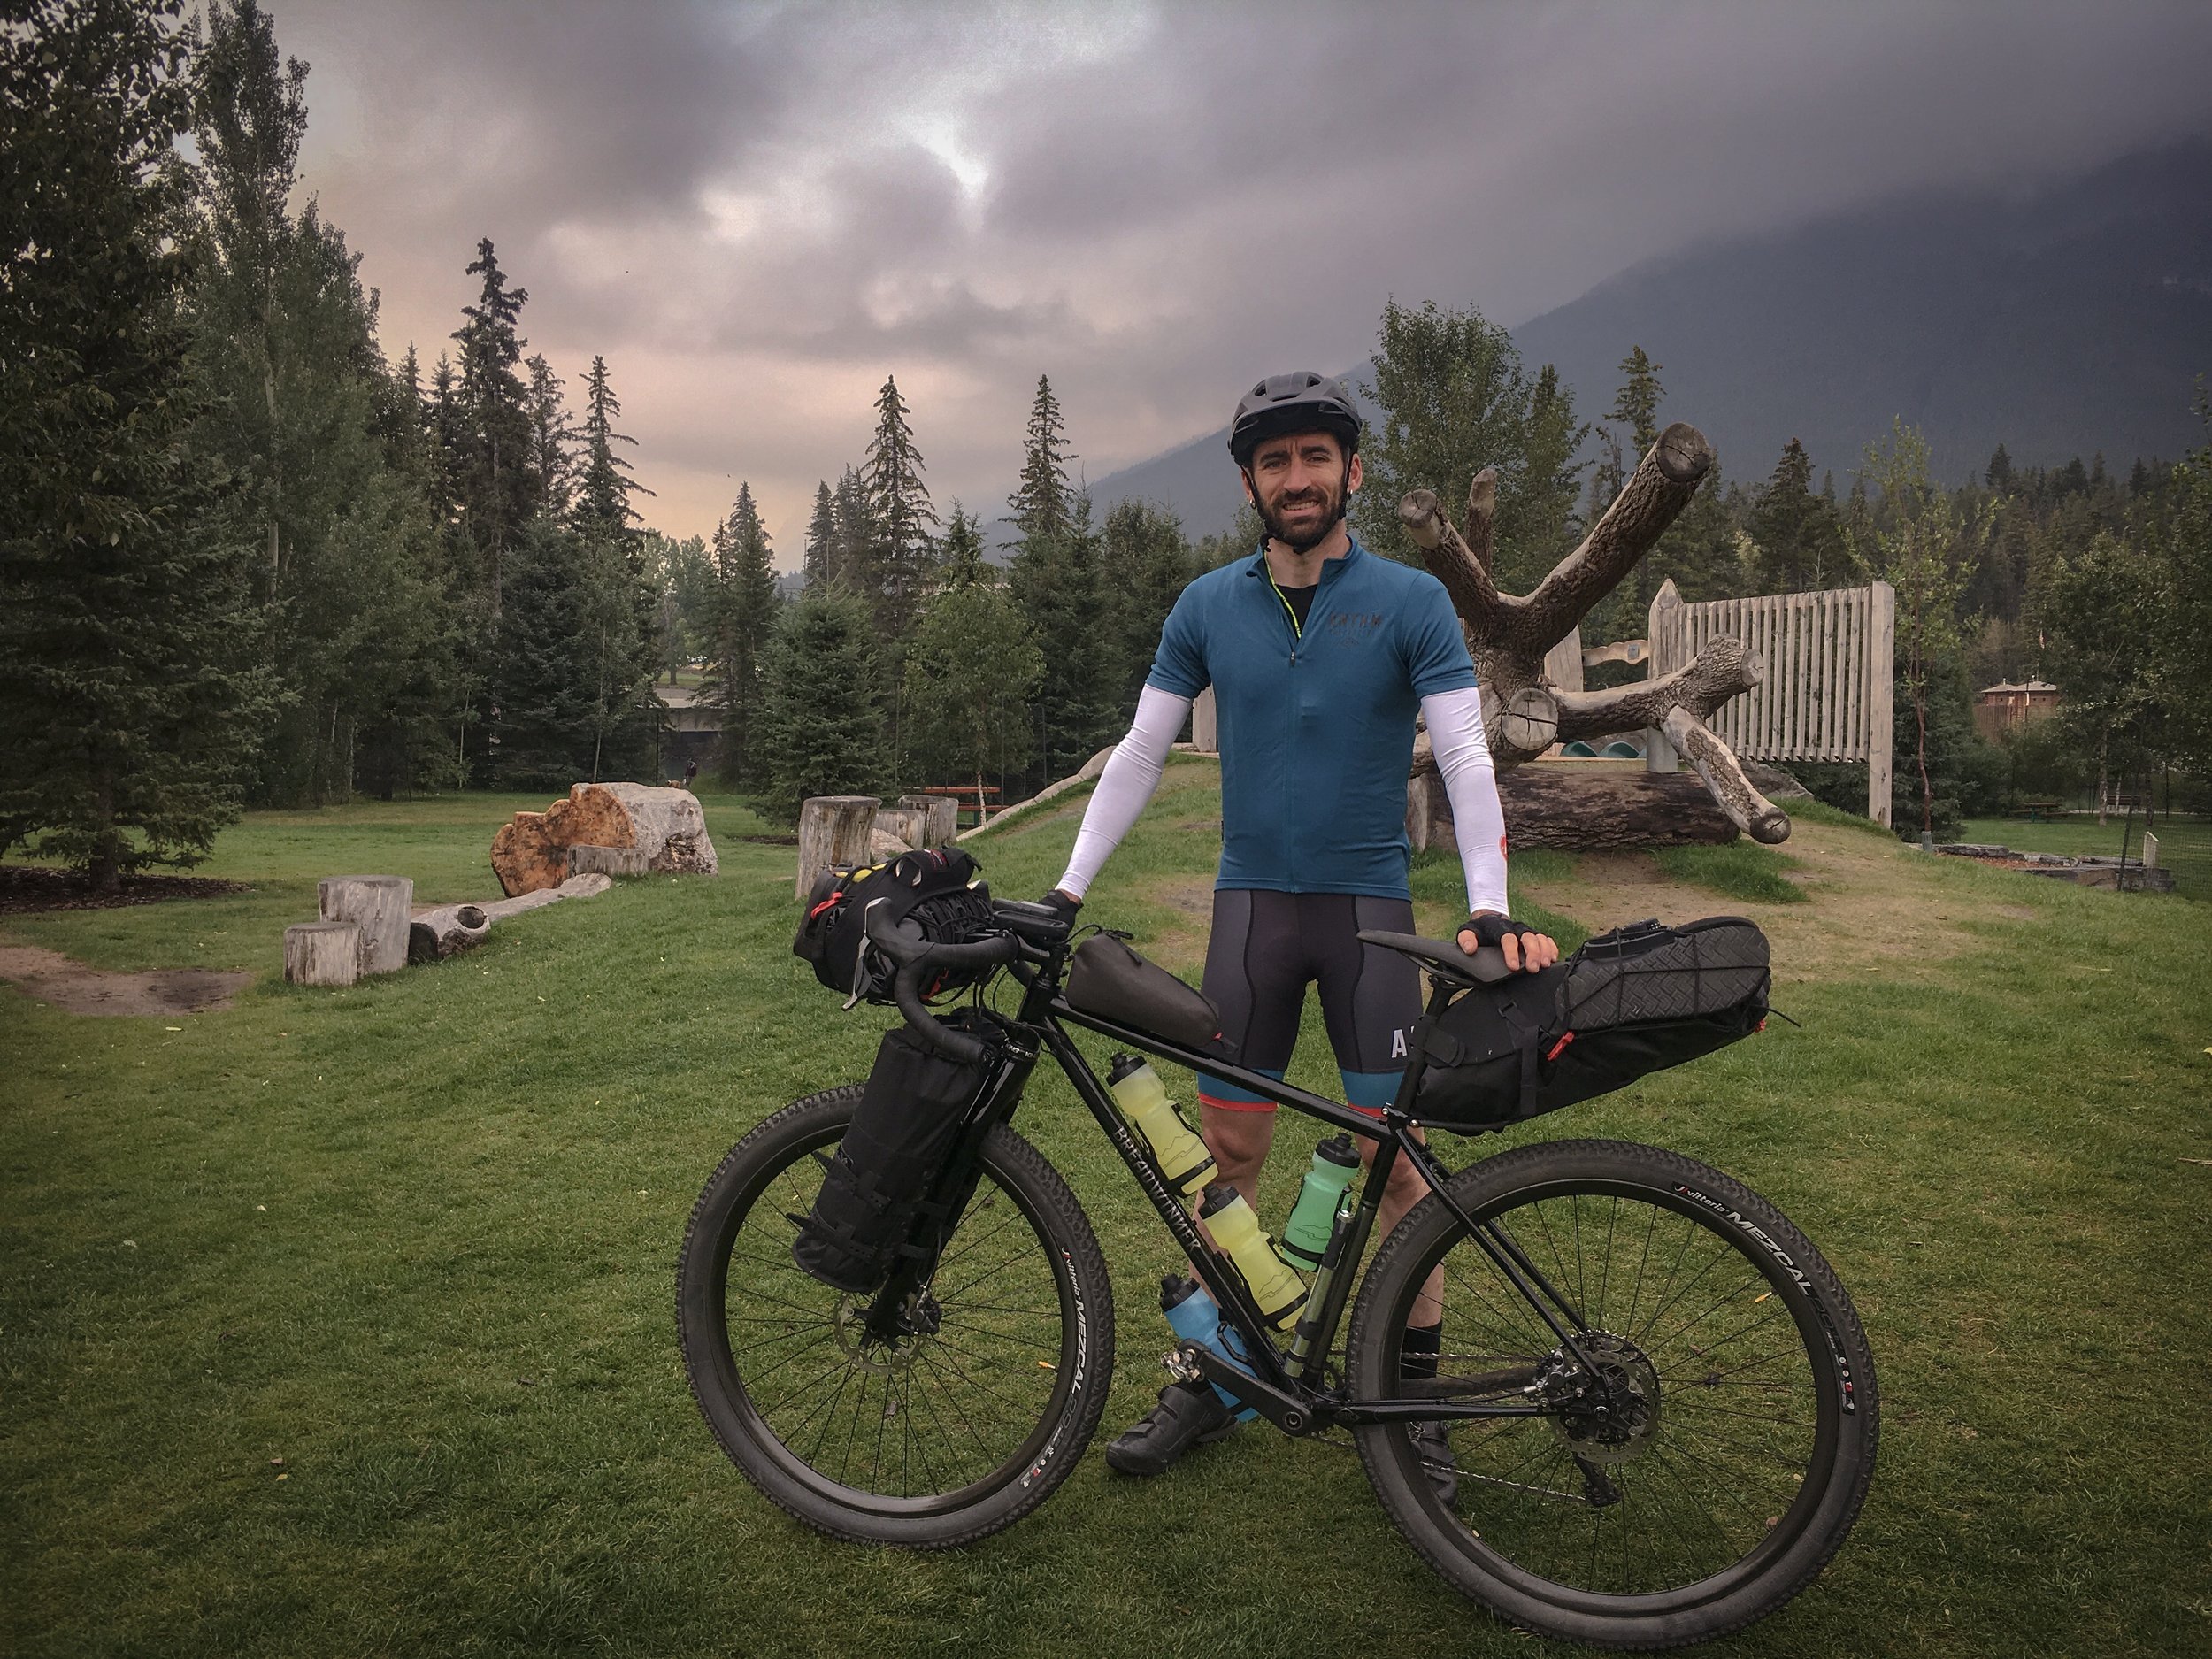
Having recently completed a solo traversal of the Great Divide Mountain Bike Route, you've described this as the hardest thing you've ever done on a bike. Aside from the obvious physical difficulties of undertaking a route like this, how would you characterize the psychological challenge to approaching the GDMBR as a solo rider?
This definitely has been the hardest thing I’ve ever done.The other day I was thinking how this compared to my time in the Army, both in basic training and when I was deployed to Bosnia back in the 90’s, and this still seemed harder. First and foremost, the solo element was a huge challenge but not one that’s completely new to me. I do a lot of my riding solo, and I completed the Trans Am bike route by myself back in 2009. However, this trip was more remote than anything else I had done before. There were plenty of times where I would talk to myself, to the wildlife, yell at a hill that would never end, or have a one-way exchange with various storm clouds that seemed to be following me around all day. There is something very pure and free about riding alone, it’s just you and the road ahead. But this freedom has its price. You make all the decisions about everything, which means you own it, the good, the bad and the ugly. Your decisions are all you have to go on, your survival, health and safety is 100% in your hands. There is also nobody to share or validate these experiences with you as they happen. Riding through a gorgeous sunset, passing a moose and her baby drinking by a river, getting caught by a thunderstorm, or riding long and late into the night. There is nobody to turn to and say, “Dang, that’s amazing”, “Did you see that?”, or “This totally sucks!”. You can take photos to try and capture the moment, but they don’t do it justice. In the end, going solo means it’s all you. What you experience, the decision making, the takeaway, the motivation, it all comes from you, it’s very empowering, and scary at the same time. Were there plenty of times where it would have been nice to have had someone else to talk to, absolutely. But finding a good riding partner for something like this is pretty hard. And having the wrong person with you can have the opposite effect and really ruin the whole experience.


You're certainly no stranger to long-form endurance racing and riding. How was the preparation for this different from races/rides you've done prior? Can you describe your fitness or training regimen leading up to a ride of this magnitude.
When I did the Trans Am in 2009 I was in terrible shape. It was a rough start but I rode into shape pretty quickly. I knew this trip would be harder overall than the Trans Am, but I was confident that whatever fitness I may be lacking, I could quickly acquire during it. I went into this tour in good shape having done a fair amount of gravel races throughout the year, as well as many long and challenging one day rides. About a month before my trip, I did Ryan Francesconi’s crazy Tumala Wildcat route to prepare for long days on the tour. It ended up being the second longest ride I had ever done at 160 miles, and 13k of climbing. I had mixed feelings about riding this long after that, but on my trip I ended up pulling quite a few ultra-long days and I realized the challenge to go long is addicting.


A week before I started my tour, I rode my bikepacking bike fully loaded from Portland to the coast and back via mostly gravel/dirt roads to test out my setup. Since the Trans Am, I had done various other road tours, but never any bikepacking. I had originally planned to do the Oregon Outback as a shakedown ride but I didn’t end up getting my bike and gear prepared before the excessive heat and fires hit. With my departure date quickly approaching, the coast trip was a must to get things dialed and make any last minute adjustments. This shakedown ride was hugely valuable in figuring out how the bike rode and handled fully loaded. It also allowed me to test out all my gear in a realistic setting and make any adjustments and tweaks. The overall effort riding offroad full loaded was eye opening but everything worked great and I only had to make some small adjustments, so I felt pretty good.


I'm sure there were quite a few hairy moments out there. Were there any ever any times when you thought you might pull the plug and not finish?
The human body is pretty impressive. After having done and endured things I never thought possible in the army and then more bike specific things on the Trans Am and other epic gravel rides, I realized I have a pretty enduring spirit. That, and being stubborn, kept me pushing forward on the Divide’s daily challenges. The one time I had my spirit crushed and had thoughts of pulling the plug was riding out of Rawlins, Wyoming. I had just started and wasn’t even a mile into my day when, as I was reading something on a billboard, I heard a huge pop and a crunching sound, and my bike suddenly stopped. When I looked down I saw a huge 8” long ¼” thick metal rod sticking clear through my tire, the carbon rim, and then out the other side of the rim. Sealant was everywhere. The piece of metal, which I later learned was a hay baler tine, was caught on the chainstay preventing the wheel from turning. Stunned, I didn’t even know what I was looking at at first. After removing it I rolled the bike off the road and tried to figure out what do to. How the hell had this happened, I took my eyes off the road for only half a second! The exit wound on the side of the rim looked bad, I didn’t see how I could ride on the wheel even if I was able to get a tube in the tire and air it up. There was nothing even remotely close to a bike shop in Rawlins and it was the last town I wanted to be stuck in. After consulting my map, the closest shop was in Steamboat Springs Colorado, 160 very difficult miles away. I checked the wheel and it was still true, and the spoke tension around the damage had not dropped, so I texted my friend Shawn, who owns Ruckus Composites, and sent him a photo of the damage asking if it was okay to ride on. I was skeptical, but rather than thinking about being stuck in Rawlins waiting for a replacement wheel to be shipped to me, I pulled off the tire, booted the hole in the rim bed, the tire, put a tube in and just started riding, waiting for the wheel to taco at any second. When Shawn got back to me he said he thought it would probably be fine, but I would need to do a field repair to prevent the damage from spreading and prevent water from damaging the exposed carbon. While this was good news, every bump I hit on the ride to Steamboat made me cringe. The worst was a very rough and rocky climb and descent after the Brush Mountain Lodge that seemed to go on forever. I honestly don’t know how the rim held up during this abuse with a huge hole in the side. When I finally got to Steamboat I headed to Orange Peel Bikes and Shawn talked me through the wheel repair. It took half the day since I had to clean out all the sealant that had gone into the inside the rim and then let everything dry before doing the repair. I am super grateful for his help as well as the guys at Orange Peel for letting me use their shop and tools to get me back on the road again. The repair held up for the rest of the trip, and I soon forgot it had ever happened. I consider myself really lucky, as this could have gone a totally different way. I also have a new-found respect for carbon rims.


The GDMBR starts in Jasper, AB, with several days riding and camping deep in the heart of grizzly country between Alberta and Montana, did you have a grizzly protocol or contingency plan in case of an encounter?
The original start of the GDMBR (and the Tour Divide) had been in Banff, until last year the Adventure cycling association decided to make the route longer and start it in Jasper. My original plan was to start in Banff, and since they had closed some of the campgrounds in Jasper due to excessive grizzly activity, I stuck with the plan. I also heard mixed reviews during the ride from some of the people who had ridden the Jasper section, so I didn’t regret skipping it. The route is long enough, and I never felt the need for it to be longer. It also looks like the 2019 race will continue to start in Banff.

Equipment wise I came prepared for the bears. I had bear spray attached to the top of my handlebar bag where it was easy to get to quickly. On advice from my friend Leah, who had hiked the Full PCT, I brought a bear proof Ursack with a scent proof OPsak inside that I used for food and anything else with a scent. I would tie it to a tree whenever a campsite didn’t have a bear box. Additionally, on advice from my friend Tom who had raced last year, I carried a super loud safety whistle around my neck and would blow it anytime I was riding in areas with decreased sightlines or lots of vegetation. The whole time riding in grizzly country I has hyper aware and probably more stressed out than I needed to be due to the possible threat, especially since I was alone. On day three of my trip I pulled a long one and rode 140 miles from Elko, BC to Whitefish, MT. I hadn’t planned on going that long but decided to see what a proper race distance would feel like. Once things got really dark, I was deep in the forest and started thinking maybe this was a terrible decision, with visions of grizzly bears jumping out of the bushes at every turn. I blew the hell of that whistle for the last 50 miles and was really happy to have it. Who knows if it helped or if there were any bears in the area. The next day, my friend Tom commented on my Strava activity that this particular section is known for grizzly sightings and he himself got caught behind some bears late at night in the rain while riding it. The bears wouldn’t get off the road so he had to walk slowly and at a distance behind them. That night he was so freaked, he ended up sleeping in a pit toilet. Needless to say, I was very happy when I got to the end of grizzly country (Pinedale, Wyoming), without having a harrowing experience like that. My stress level went down considerably and I sent all my bear stuff home at this point. For the rest of the trip I only saw one harmless black bear.


Can you describe the bike and bag setup used for the GDMBR?
I had a Breadwinner JB Racer frameset built specifically to do the Trans Am Trail route but had to scrap that idea because I couldn’t get enough time off to complete it, so I shifted focus to the GDMBR. The overall equipment needed was mostly the same though, a drop bar mountain bike set up with a rigid fork. My inspiration for the bike was the Salsa Cutthroat and the Moots Baxter, both drop bar mountain bikes. The difference being, both of those bikes can only be run in a drop bar configuration because of their shorter top tubes and steeper head tube angles, but I wanted a bike I could easily swap between drops and flats. I worked with Ira at Breadwinner and settled on something that would do both without any real compromises, which gave me the option to convert it to a “real” mountain bike when not bikepacking. This versatile concept proved itself before my trip allowing me to do mountain bike rides and race short track with flat bars and a suspension fork, and then swap to drop bars and rigid fork for adventure rides, even mounting full fenders for the winter rides. But the big test was this tour, and this bike just ate up the terrain, staying comfortable and never missing a beat. I’ve never owned a more versatile or capable bike.
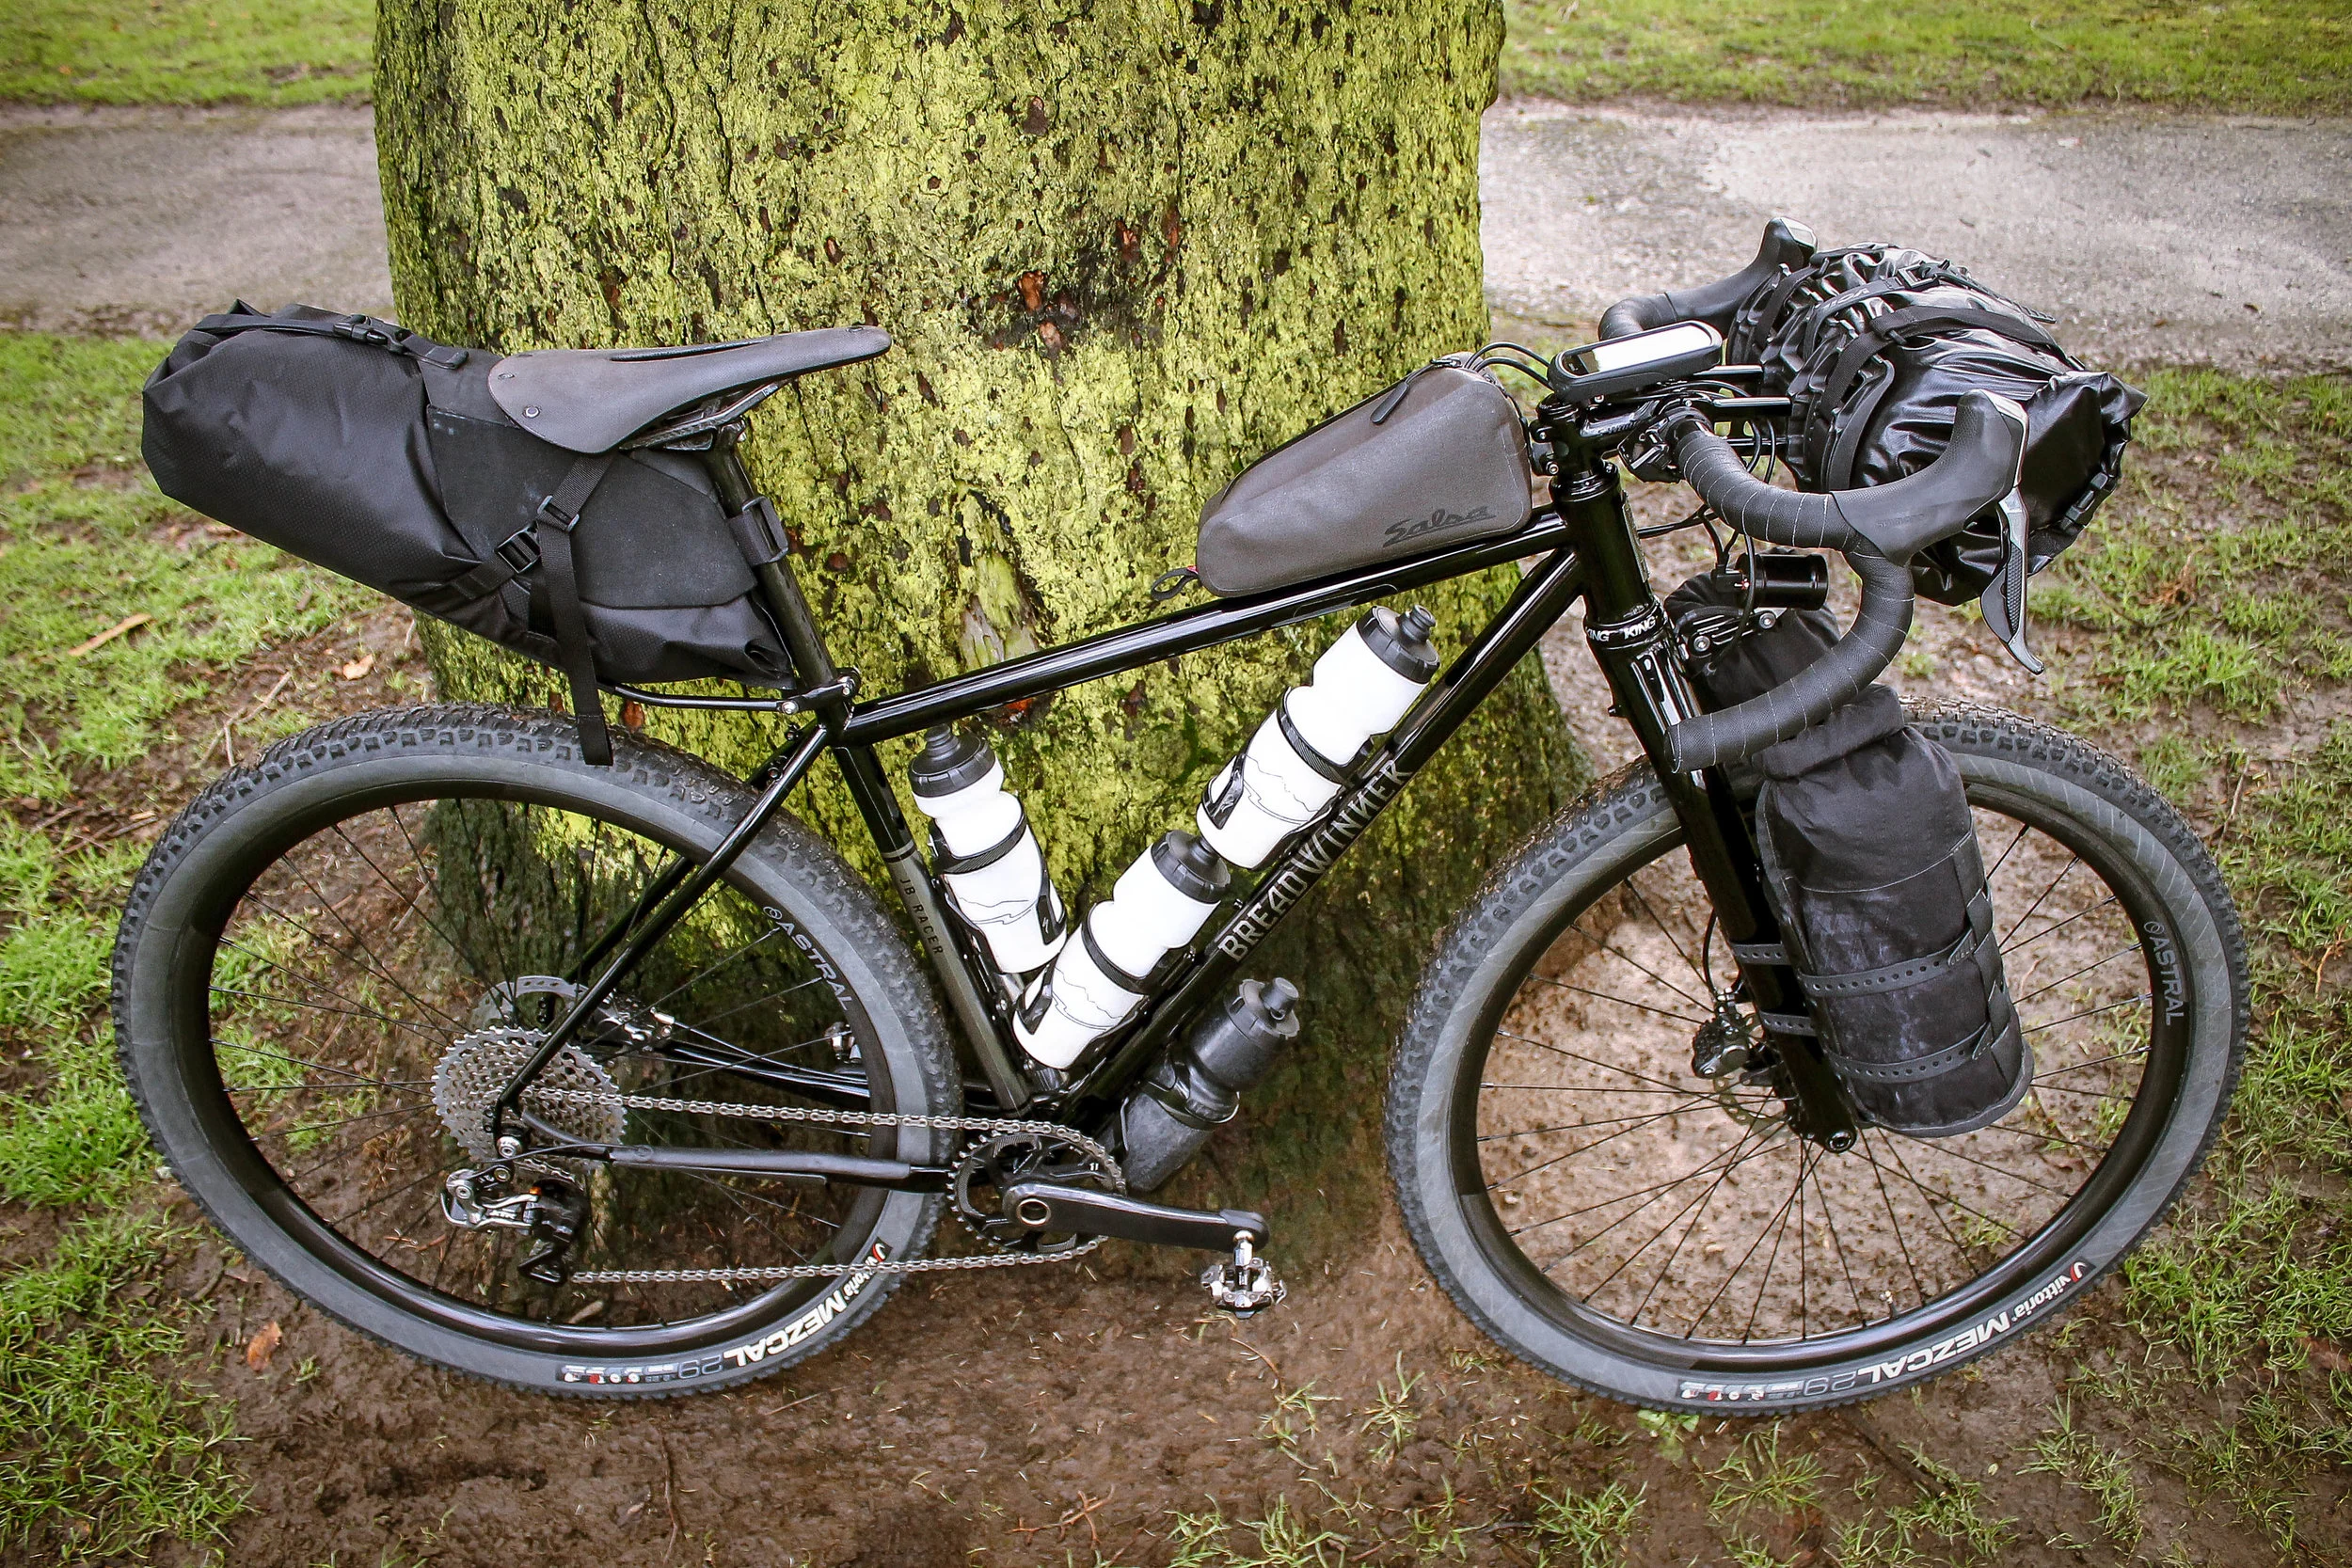
Most people I saw on the route were riding flat bars which I am so glad I didn’t go with. Many racers of the Tour Divide use drops which make more sense due to the mostly non-technical terrain, headwinds and long stretches of gravel roads. Also, having drops allows for more hand positions and thus better comfort over the long haul. We built the frame around Salsa’s Cut Throat rigid fork which has triple cage mounts on the fork blades for Anything Cages, a fork crown mount and internal routing for a dyno light. Some people use suspension on this route, others go rigid, I was happy with my choice to go rigid. The ease to mount bags, the reduced weight, and the simplicity of a rigid fork outweighed a little added cush, which really wouldn’t have helped much on all the washboard sections, though there were certainly times I would have liked some suspension.

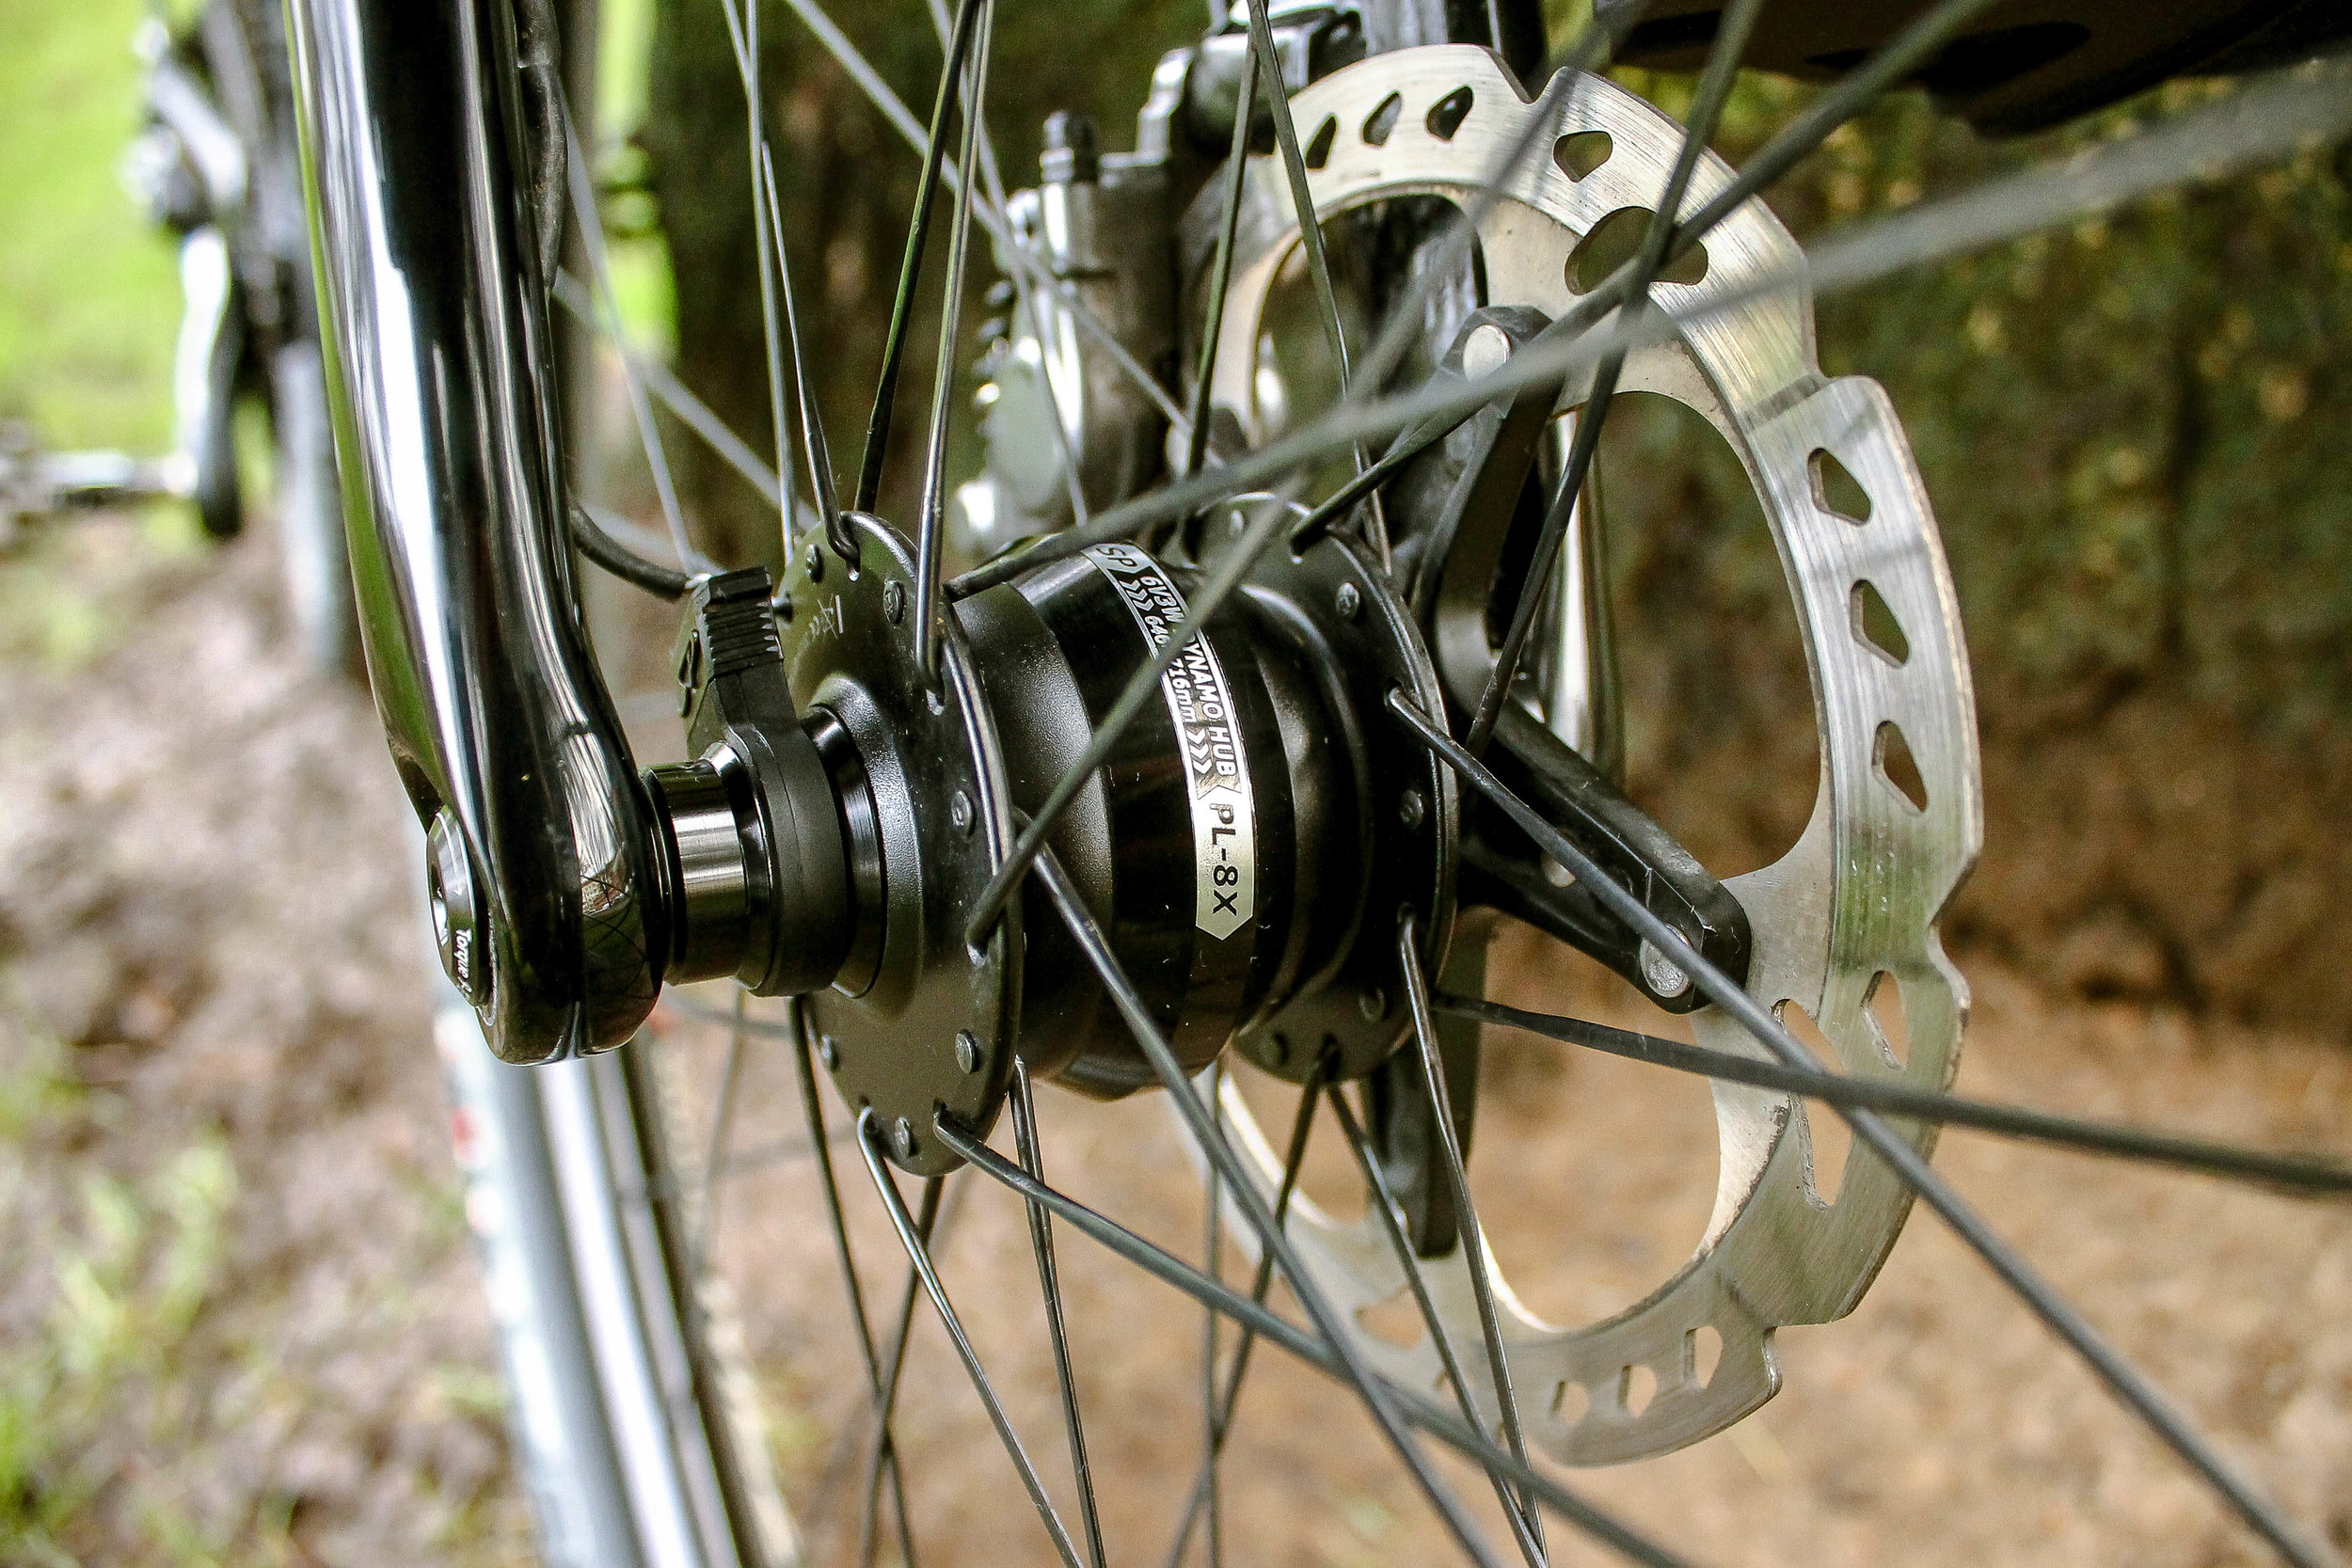
To be able to easily swap between drops and flat bars I had to go with a Di2 drivetrain. I was a little worried about the durability and reliability of it for this trip but I ended up having no issues at all. I charged the battery twice on the trip, the second time I let the battery go completely flat and lost shifting. I just stopped, plugged the charger into the battery in my top tube bag which was connected to my dyno, and off I went. As soon as the system was getting a charge my shifting was back. I had no idea it would function while charging but it was a pleasant surprise and made me feel a lot better about the self-sufficiency of an electric drivetrain and a dyno charging system. My dyno system consisted of a Shutter Precision front hub, Sinewave Beacon integrated headlight/charging system and a Goal Zero Venture 30 waterproof battery. This system worked flawlessly the entire trip. I left the battery plugged in during the day to charge and it was always full at the end of the day. I charged my phone and GPS daily from this battery and periodically charged my headlamp, GPS tracker as well as powered the LED Mountain Glo system in my tent at night. The headlight was plenty bright and allowed me to ride late into the night, oftentimes while raining and covered in mud. Dyno hubs only reach full efficiency at a certain speed and will flicker a certain amount if below that speed. When you are on a steep climb or riding technical single track at night you aren’t going fast enough to get enough real light output. The Beacon allows you to connect the battery back to the light to power it when it isn’t getting enough power from the hub. This allows for the light to be on at any speed or even while stopped with no dimming or flickering. I discovered this feature to be crucial on any days that I rode into the night. On the 140 mile ride into Whitefish, there was a very long and dark climb and descent in grizzly country before heading into town that I had mentioned previously. I didn’t have the battery connected to the light and it totally freaked me out when the climb got steep and I could hardly see anything because I was going so slow. I didn’t want to stop and dig out the cable because I would lose pretty much all my light and I was afraid a bear would get me in the dark. I never made the mistake not having that cord connected again.


I set up the bike with a 1X drivetrain for simplicity and my previous success with 1X drivetrains that I use for mixed terrain situations. Based on feedback from my friend Tom and other racers’ bike setups, I used a 32t front ring and an 11 speed 10-42 cassette. This gearing was good for most situations though there were times where I could’ve used an extra cog or two for some of the really steep stuff. If I did it again, I would consider swapping out the 42 cog for a 45 or run the e*thirteen 9-46 cassette. I replaced the chain in Colorado after things started to sound a little rough, though it would have made it the whole trip most likely. I brought a small bottle of Rock N Roll Extreme chain lube since I have had such good success with it the past few years riding and racing offroad. I never dropped the chain and never had any drivetrain issues.


I ran metal compound brake pads which lasted the entire trip. As per Tom’s advice I used Vittoria Mezcal tires, but only after I did my shakedown ride out to the coast on a set of Continental Race Kings and was disappointed. The RK’s are a popular tire for Divide racers but I had issues getting the bead to seal and I didn’t think the tread pattern was very competent on gravel. I started out with 2.25 front, 2.1 rear, but after destroying the rear tire in Rawlins I ended up with a 2.25 rear since that’s all the shop had in Steamboat. I liked the extra tire volume on the rough stuff so I would choose that size again. Besides the two huge pieces of metal I ran over, the tires were flawless, rolling great on pavement and hard pack and very competent in the rough stuff, with no additional flats or problems. I was really impressed with the Orange Seal Endurance sealant after running over a 5 inch long piece of rusted metal on a rail trail in Idaho. The metal went into the middle of the tire and put two additional holes in the sidewall. I used a Dynaplug to seal the large hole and the sealant took care of the holes in the sidewall. I recently removed this tire and the there was still plenty of sealant left inside with almost no dried build up. This is 6 months after installing, which is impressive.


Tom helped me out with gear selection and shared his gear list with me. Additionally, I also got gear advice from Leah, the PCT hiker. Combining info from them, online research and my own gear experience I put together my kit. I wasn’t racing so I didn’t want to go extremely minimal, but I stuck pretty close to the racer strategy. Especially after learning my lesson on the Trans Am starting out with way too much stuff. What helped a lot was deciding not use a frame bag. That left me with two bags on the fork legs, a handlebar bag, a top tube bag, and a seat bag to fit everything into. I’m not a fan of frame bags because they never fit perfectly to the frame unless you have one made specifically for your frame and often end up scratching up the paint anywhere they come in contact with the frame, especially on rough terrain or when dusty or muddy. Not using a frame bag also allowed me to use water bottles in a normal configuration on the frame and didn’t restrict me from being able to grab the top tube when portaging the bike over things. After deciding on this setup, I had Breadwinner add more bottle mounts so I could carry 4 normal bottles mounted to the frame. Having all my water in the bottles was great on the trip. I could easily see how much water I had at any time, the bottle position was just like my normal bikes so nothing felt strange or was inconvenient to access and cleaning the bottles was easier than a bladder. I also added mounts to the top tube so I could bolt on a top tube bag. The top tube bag was super useful for holding snacks and my dyno battery. Top tube bags are great for easy access, the downside is that your knees rub them when riding out of the saddle. If you use a normal strapon version, they often get knocked around by your knees as you pedal. The bolt-on version stays put, and I eventually learned to adjust my leg position while pedaling so the rubbing was minimal.


On the fork I used Salsa’s Anything Cages with custom bags made by Bike Bag Dude out of Australia. These bags are made specifically for the Anything Cage but are larger than the Salsa stock dry bags. The bags performed flawlessly, and I was surprised at how much they could hold. I used the Salsa Anything Cradle on the handlebar with their waterproof bag. I wanted a stabilized handlebar bag after seeing other setups that would move around on the bars or rub on cables and wear out housing etc. The bag with the cradle is really designed for a flat bar setup so it’s pretty long, too long to use with drop bars since you end up with so much of the bag ends rolled up. I sent the bag to Mountain Soles and had Matt shorten it, and then it was perfect. The adjustable straps Salsa provides for the the Anything Cage and cradle tend to loosen over rough terrain so I swapped them out for Voile straps. I had to use the Salsa straps on the cradle initially in order to attach the Salsa accessory pack which integrates with their straps. I was very disappointed with the accessory pack I got and ended up sending it home when I was in Montana. The pack, which is shaped like a rectangle, attaches to the outside of the round dry bag. Because of this, it gets much harder to put things in it when things are tightened down. The most annoying thing is that it rattles over rough terrain, which is most of the trip, and anything in the bag gets shaken to death. Most food in the bag was reduced to dust and many other things were ruined from getting shaken around so much. Even instant coffee packs were ruined as holes were worn into the fairly thick plastic packaging. Obviously riding on a trip like this your setup is not going to be silent, but when you have been riding on a long stretch of washboard for hours into a headwind, having a bag that is rattling excessively, accentuating every up and down of the washboard can really get to you. I was so much happier without that bag. Overall the Anything Cradle was awesome, it kept the bag out and away from interfering and rubbing on my cables, everything was rock solid and never moved, and the bag always kept everything dry inside. The cradle can be used with any dry bag that has some sort of ladder strap on it. But the Salsa bag has small straps on the top that keep the bag attached to the cradle when you loosen the main straps to remove what is inside, rather than completely remove the bag from the bike every time you unload it.


On the rear I went with the Porcelain Rocket Mr Fusion seat bag handmade in Canada. There are many seat bag options available for bikepacking, but most just use straps to hold the bag to the saddle and seatpost, and tend to sway back and forth while pedaling, especially when out of the saddle. The Mr Fusion uses a mini rack cradle system that attaches to the seatpost and completely eliminates any sway. I wanted to use a carbon post for comfort, so I ended up attaching to a Salsa seatpost clamp with rack attachments rather than the seatpost. This system did what it was supposed to and the bag didn’t move. Of all my bags, this was the only one that was somewhat of a disappointment. Part of the issue for me was the seat bag idea itself. I don’t love the tapered shape of a seat bag since it makes it more difficult to pack things in well. But the biggest problem was that the light and thin material of the dry bag ended up with many holes worn into it from rubbing against the rough Cordura material of the cradle. I was pretty surprised that after just one day a hole had started to develop. This trip was extremely rough and at times the bags were covered in mud and sand which just made the wear even worse. At the end of the trip the seat bag was pretty much ruined, but my other three bags were fine. I was told by Porcelain Rocket that you shouldn’t have any hard items in the bag. I had a compression sack inside it, which has plastic buckles on the side for the compression straps. It seemed like this was where the holes were coming from, but I had an identical compression sack inside the Salsa dry bag attached to the Anything Cradle and that bag was fine. Porcelain Rocket was very nice and replaced the dry bag at no charge, but I plan on trying a different system for my next trip. I met a fellow Divide rider Jeremy at the Brush Mountain Lodge in Colorado who was using a lightweight titanium rear rack on his Salsa Vaya. It consisted of two Seal Line river dry bags clipped together and hung over the rack, using Voile straps to secure the bags to the rack. It was a simple setup that didn’t move, or slide around, he said he had no wear issues and the bags were a lot easier to put gear into. This setup also puts the weight lower on the bike and offers more volume than the seat bag. I was a little skeptical when I first saw his setup but after my trip was over and my bag had self-destructed, I contacted Jeremy to ask how everything had held up for him and he reported no problems, excessive wear or any rattling. Obviously running a rear rack on a mountain bike is not realistic for most frames but my Breadwinner has full rack mounts so I have a good feeling it will work out for my next trip.


Being space-limited, required me to be very minimal with my clothing selection. Using recommendations from Tom’s gear list, my own clothing experience and some online research I put together my clothing kit which proved to be pretty much perfect for the entire trip. The strategy was having things I could easily layer and use both on and off the bike. I also wanted clothing I could wear while at camp or in a town. Having as much wool as possible was also important due to its superior ability to manage temperature and moisture and not take on odor. It also just feels real nice to wear all day. A couple of notable call outs were the Gore Shake Dry 1984 jacket which acted as a wind shell, rain jacket and packed down to next to nothing when stored. It even fit over my down puffy jacket if things got real bad. Having a mountain bike helmet with large sun visor was a game changer on this trip. I always wear cycling caps when riding, but the larger sun visor kept the sun out of my face and rain out of my eyes better than any cycling cap could, and the visor could be easily adjusted or moved out of the way if needed. I used the Specialized Ambush which was one of the only mountain style helmets I found that you could easily stash your sunglasses in. Many road helmets have this ability but it’s not a feature on mountain helmets and I found this feature invaluable for bikepacking. I only took one cycling jersey on this trip, the ANTHM Collective merino Saltzman. This jersey proved itself to be a true “one quiver” jersey in its ability to be warm on the cold days, cool on the warm days and always comfortable. I only washed it a couple of times and it still looks fantastic for how much abuse it endured. Sometimes I would overstuff the pockets, but I never lost anything and the zippered side pocket was a very useful and secure place to keep my chapstick. I don’t think I would make any modifications to my clothing selection for my next trip, it all worked flawlessly.


What was your navigational strategy? Garmin...iPhone...Gaia...all of the above?
My main source of navigation were GPS maps loaded on my Garmin 1030. I bought all the GDMBR route maps from the Adventure Cycling Association and in addition my Garmin also has base maps for all of North America so it could be used for navigating if I needed to take a detour. I also downloaded the ACA app on my iPhone and purchased the GDMBR route maps for that. The nice thing about the app is that it functions very much like their paper maps in that it gives you points of interest, food, water, and lodging stops as well as information about the climate, terrain and similar. The maps use google maps so they can be very detailed when zoomed in. In addition, everything can be downloaded to be available offline when there is no service, which is most of the time. The app also allows you to pick two points on the route and it will give you distance and elevation for your selected segment. This was hugely valuable, and I used it to plan my days, see what I had left to do on a long day, as well as plan water and food resupply.


I took a Garmin InReach Mini as my GPS tracker and am super grateful to Western Bikeworks who supplied me with this device. The InReach would send my current GPS location every 20 minutes to a web page so friends and family could track my progress and stay current on my location. This device also allowed me to communicate via text through an app on my phone, no matter if I had cell service or not. It also had an emergency button I could push that would summon an emergency response. For added redundancy, I downloaded all the maps to the InReach as well. The mapping on my Garmin worked perfectly and I never was lost or took a wrong turn. The communication on the InReach worked great and it was nice to know I could always send and receive messages. This was especially helpful staying in contact with my girlfriend on a daily basis. She was picking me up at the border and I ended up finishing 10 days sooner than planned, so this communication was key in figuring out when she should leave. Cycling GPS technology has come a long way from when I did my first tour and I had no issues with the tech on this trip.
What was your nutritional approach while on the road? I imagine with something of this length, there was a fair amount of restocking necessary. Can you give us some insight into your approach + planning of how much was carried vs. restocked along the way?

My nutritional approach was very similar to what the racers do, which is to not carry a stove and mainly eat food from gas stations, marts etc. Because I wasn’t racing, I had more time to get better food so I would try to ride to a town or some place that had some sort of restaurant. Bonus, if there was a café for breakfast the next day. The prospect of a good dinner and a beer propelled me forward during the day and starting out with coffee and a big breakfast in the morning was pretty nice. It was actually easier to find places that made food for you rather than grocery stores or places that sold food supplies. To stock up on my on-the-bike food, I would primarily shop at gas stations. My on-the-bike food was mostly junk food and consisted of things like danishes, cinnamon rolls, rice crispy treats, gummy bears, cookies, a banana, nuts, jerky, and also my lunch for the day. I would usually get a premade sandwich or even better was to get a frozen burrito which I attached to my handlebar bag which would be defrosted by lunchtime.


I generally filled my bottles with Gatorade or Powerade when available and would fill according to temp and water resupply points. I also carried a MSR Trail Shot water filter in case I ran out. I would try to do my re-supply that night, so I could just grab breakfast and go. I started the tour with a stove because I wasn’t fully comfortable not having a way to make food in a pinch, but quickly realized it was going to be easier and lighter to go without and getting rid of anything unnecessary is a great feeling, so I ended up sending my stove home in Helena, Montana. Getting rid of the stove meant that I would often have to ride great distances to get to a restaurant or some sort of food supply. This happened mostly in Colorado and New Mexico where I had quite a few 130, 140- and 150-mile days. These states also had the worst weather as I caught a late monsoon season, so it made some of the miles even more difficult and slow. There were a few instances where I got into a town too late for anything to be open and had to settle eating whatever I still had on the bike. It’s not a great feeling finishing a really tough 140-mile day and only being able to eat a doughnut, some jerky or some cookies, but it was all part of the experience and there was never a time when I completely ran out of food. On my late nights when I was starting to run low on energy I would get a temporary recharge from eating a bag of sour gummy worms. They ended up being my “in case of emergency” food ration. Food is heavy, so I made sure I had just enough to take care of my needs during the day and a little extra in case I couldn’t get dinner that night or breakfast the next morning.

In your experience, is there anything that stands out as the most unexpected takeaway from a trip/endeavor/undertaking like this? Can be anecdotal, technical, philosophical, some combination thereof?
There were a few things that really stood out to me on this trip. Experiencing the people and communities along the way, how they lived, and how they interacted with each other, their environment and me was really special. I met many different people on this trip, other cyclists, backpackers and locals. It was great to share this experience with others, hear their stories, and interesting to see the different ways people choose to live. I loved the variation of old and new buildings, different styles of homes in and out of towns and in the middle of nowhere. I found myself making up possible stories as to what various ruined buildings used to be. In quite a few instances I was also positively surprised how welcoming and accommodating people can be for strangers, when they let me stay at their homes or invited me to a meal.

Riding through the vast and differing landscapes that make up this country, as well as the weather that comes with it, is breathtaking. It is easy to get used to what you ride locally, but being able to ride such a long distance through so much variation gives great perspective and appreciation to what we have available to us. At the same time it was very alarming to see how much of our forests have burned down, as well as being stuck in smoke filled skies from current fires for half of the tour. I ended up not seeing so many of the beautiful mountain views due to smoke. I also saw many severely dry forests filled with dead or dying trees which was an alarming sign of things to come.


My third, and maybe biggest take-away was realizing you can do more than you think. The sheer magnitude of riding a route like the GDMBR only becomes evident as you actually start riding it. It is not something you could ever imagine doing and oftentimes you aren’t considering the ride as a whole. But after a 150 mile day that you thought would never end, or crossing the border into the next state, or looking back at the mountain range you just traversed, then you realize it, even if it is just for a second. The reflection of what I was doing or had already accomplished, provided a moment of clarity and gave me motivation to keep going and meet the next challenge, of which there were many. In the end, you realize that there’s much in your life that ultimately doesn’t really matter and that we spend too much time worrying and stressing about unimportant things. All of that noise just started fading into the background while I was out there.

I recall your having posted something via Instagram effectively recommending against riding the GDMBR in a solo capacity. To most people, the reasons would be self-evident, remoteness, vulnerability, etc....but are there some specifics that compelled that particular post?
My post on Instagram was primarily reiterating what the Adventure Cycling Association mentions about this route in that it shouldn’t be ridden solo, for all the common sense reasons. I was highlighting the Garmin InReach satellite tracker which I feel is a mandatory item when going solo on something like this, or any long, or multi-day ride that is remote. And even though I had this device with me, there were many, many times I was reminded of how remote I was, having not seen other people for most of the day. Because of this, I tried to be as careful as possible and make smart decisions, which became more challenging riding late into the night, or on some really fun descent. Jeremy, the cyclist I met at Brush Mountain Lodge had gone over the bars on a technical descent and broke a rib. When I met him, he had been riding for days in pain and still was another day away from an urgent care facility. I passed another guy in the middle of nowhere in Colorado on a long gravel road trying to outrun a thunderstorm. He had crashed and broken his derailleur, so he was riding single speed until he got to the next town with bike support. At the end of the day, doing a solo remote ride is an amazing experience, but precautions need to be taken if you decide to go into it alone. Maybe backing off slightly on a descent, walking through a sketchy rock garden, or not bunny hopping a log are some concessions that need to be made to help you get to your destination in one piece, or at all.
Follow Brian @fairlyunreliable
Photographs by Brian Kesselman and Ron Lewis

